Pages

Dec 17, 2008

Easy Ways to Add the Christmas Spirit to Your Home

Easy Ways to Add the Christmas Spirit to Your Home

If you're like most people, you don't have much time left at the end of a busy day to do anything extra. But at this time of year, you want to do something to make your home look festive and special and create the wonderful Christmas holiday atmosphere. You'll find some ideas here for quick and simple ways to add a festive look to your home without spending a lot of time or money. And you'll have time left over to really enjoy Christmas!
Most are our ideas are very easy, many are free, and none takes more than a minimum of time and effort.

1. Decorate Everything With Bows

Tie generous ribbons to chair backs, candlesticks, picks in plants, wreaths, garlands, basket handles, drapery tie-backs, stair railings, and doorknobs.
Bows look festive and the ribbons you choose should tie together with the rest of your decorating. Choose ribbons in colors and patterns that coordinate with your decorating scheme.
You don't have to stick with red and green. Choose plaids or florals that tie in. If you can't find anything that looks quite right, then choose metallic silver, gold, green, or red.
Choose a ribbon that you can untie and re-tie each year. This will save money in the long run, and you'll end up with a good collection.
When the holidays are over, untie the ribbons and press them lightly. The bows won't get crushed and the ribbons will be ready when you want to take them out the next year.
See instructions on how to make your own floral bows of all sizes using wire. By using wire to make your bows, you'll be able to attach them to many objects.
2. Use holiday tableware for every meal in December.

Look through your cupboards and get out any dishes that look festive.
Discount stores often carry seconds of name brand china, as well as fun designs that are not so common.
Start a set of holiday dishes with dinner plates that coordinate with your everyday dishes. Add new pieces each year, like salad plates and mugs. Note: Be sure the pattern you select will be continued from year to year.
Buy 1 or 2 place settings each year. Before long, you'll be able to serve a feast.
If you're adventuresome, choose a different pattern and one place setting each year. Arrange the different dishes around the table and get lots of comments and rekindle memories. When they're not in use, the dishes can be displayed around the room.

3. Turn off the lights.

Arrange lots of candles on the dining table and dine by candlelight, even if you're just having leftovers. Every meal will feel special.
Burn a fire in the fireplace each evening and encourage family members to gather around and read, do homework, write Christmas cards, or snooze.
Arrange pillar candles in your bathroom, on the sink or around the tub. Take time to soak and enjoy! If you have little children in your home, you should be very careful with candles around the house. Always have an adult in the room.


4. Hang holiday wreaths.

Put a wreath or swag on every door you have. Of course, start with the front door to welcome guests.
Go on to the back door, inside and out. Remember over the mantle, and in all your front windows. Don't forget bedroom doors, inside and out.
Use real pine, holly, or grapevine, decorated with bows, berries, fruit, pinecones, raffia, ornaments, birds, photos, or candy.
To keep wreaths year after year, buy artificial wreaths that will last. Remember, you'll need room to store them!

Easy Christmas Decorating

TRY A TABLE-TOP TREE

To save floor space, try a small table-top tree. Increase the visibility of ornaments, making it look spectacular from all angles. It will also be out of reach for small pets and toddlers.

Dress up the tree by wrapping the base in festive decorative fabrics. Choose from rich velvets, brocades or tapestry-style fabrics. Save money by using excess fabric from drapes, store samples and such. This is an economical way to add glamour to your tree skirt.

Instead of a pricier Frazier Fur tree, consider a Japanes spruce. It has small, strong and sturdy branches.

PERSONALIZE YOUR ORNAMENTS
Use a variety of ornaments and personalize your tree, rather than sticking to one theme or trend. Let your tree "tell a story" and not look too "finished". Remember, ornaments can be attractive no matter what the price. Choose cheerful ornaments. This can be done fairly inexpensively.

Use different sizes of lights and types. Choose from miniature white rice lights to large old-fashioned colored bulbs. Variety is the spice of life. The more heavy European tinsel will hang straight and looks very clean.

CALIFORNIA EVERGREEN - THE PERFECT CHOICE
For great alternatives to pine in your holiday wreaths and garlands, try bay and eucalyptus. Their fragrance is fresh and clean. They do not drop their leaves and last a long time.


You can get the bay or eucalyptus garlands by the length from your florist. Use them on banisters, doorways, mantles and around centerpieces. You can get boxwood, eucalyptus, seeded eucalyptus and bay.

DECORATING WITH AMARYLLIS
For those in a milder climate, consider red and white amaryllis as an alternative to holly. These plants grow tall and provide an elegant look. Do know that the flowers take about six weeks to bloom, but they last about 3 weeks. Place several together in a basket and cover the base with dried moss.

NEED A CENTERPIECE?
Gather your extra ornaments and place in a large glass bowl. Use this as a special decorative accent. Add more bay or eucalyptus around the base and place on a table runner for a special table display.

Nov 19, 2008

Decorate the kid's room with animals

When you decorate the kid room have some fun and be creative. Ideas for designing the perfect baby's or child's decor for an animal or Noah's ark themed room.

It is easy to give your baby or child an adorable room by decorating it with animals and a Noah’s ark theme.

The curtain and the bedspread will set the stage for the rest of the decor. Many fabric stores have a good selection of fabric in the Noah’s ark theme. Try to find at least two fabrics that coordinate. Wal-Mart carries a line of fabrics that have animals and clouds. Some have just animals and some have just clouds and there are several with a mixture of animals and clouds. This is a perfect series to use.
If you know how to sew buy the patterns you like best for the curtain and the bedspread. If you are setting up a baby’s room you may want to make the bedding for the crib in coordinating fabrics. The bumper looks cute in an animal print while the blanket is clouds or whatever else. In this case you should make the curtains the same material as the bumper. If you are decorating the room for an older child make the bedspread and curtain in different but coordinating fabrics. If you don’t know how to sew these are pretty easy beginning projects to learn on, or find a seamstress to make these things for you.

The walls are the next biggest part of the room you will want to focus on. You may opt to paint them a color that goes with the material you have chosen. A shade of blue is your best bet for a boy’s room. If you are artistic you can paint clouds on the ceiling and animals on the walls, but a plain background will look nice when you add a few accessories.
Now for the accessories. An easy way to brighten the room is to add colorful picture frames. Soft yellows, greens or purples are nice. You can make these frames yourself by covering old frames with wallpaper or wrapping paper. Just cut out the paper a little larger then the frame. On all of the corners cut a diagonal line so that the paper can be folded and wrapped around to the back of the frame where you will glue it. Make a large frame to hold the Noah’s ark scene. This will pull the whole room together.
You can add expression to the dressers and bookcases with scarves. Use a coordinating material, cut it the length that you want, hem and you have a bookcase or dresser scarf.

You can also paint animals on the dresser or bookcase. Each drawer on the dresser could have a line of different animals walking two by two. If you can find a tall wooden lamp, you could paint a giraffe on each side. The lampshade can be stenciled with animals and the ark.

Finally, you can add a border about half way up the wall. You have three options for making the border. You can buy a wallpaper type border, you can paint the animals freehand or you can buy a stencil and stencil the wall. Whatever you choose to do you will have created a beautiful room that you and your child will cherish.
<--------------------------------------------------------------->

Photobucket


Nov 4, 2008

The Color Yellow

The Color Yellow

Color is vital element for interior decoration in your home. Without it our house would be dull, and so would our lives. We use color to empower us, to cheer us up, to raise emotions, to color our world and personalise it.

There are many meanings for the color yellow, the most obvious ones being sunny, warm and radiant.

We use yellow more than we know it, cream is yellow, it is yellow tinted with white. Cream is an extremely popular color as it is warm but not overpowering, it is more friendly than stark white and we use it in every room and a lot outside the house too.

I used to do a lot of design work for office fitouts and I used yellow frequently. It is an innovative color and sharpens the memory, perfect for the office environment. 

Gold is yellow, rich and luxurious, a perfect accessory as seen here in this tieback tassel. 

Learn how to lay ceramic tiles effectivley,and save money!

Have you ever wondered how those tiles are laid can look so perfect? What is the secret of laying tile effectively? How can we choose the right kind of tile for our home? Yes there are different kinds of tiles that we can choose from. There is the ceramic tile, the Quarry tile, the slate tile, and of course wall tiles.

The Ceramic tiles are for interior floors, usually used in areas such as Kitchens, Bathrooms or laundries. One of the key aspects to good effective tile laying is in the preparation of the floor. It’s just like decorating; preparation is the key to success. Both glazed ceramic tiles can be laid directly onto a concrete floor, as long as the floor is dry and in good sound condition.


If you have a timber floor, you can lay tiles directly onto the timber, but only if the timber is strong enough to support the extra weight of the tiles. Tiles in mass can be very heavy, so check with builder to see if your timber floor will take the weight. If not, here are some things that you can do:
1) Cover the floorboards with exterior grade plywood; make sure that the plywood is securely fixed onto your floor. This can be done with special floorboard adhesive and then some you can either nail it or screw it down to the floor.

2) Make sure that the floor is completely level; you may need some leveling compound to do this.

If you have vinyl on your floor you may want to remove any vinyl as this will help for leveling.

Ok, so now that we have our floor all nicely prepared what now? Well, the next step is to start laying out those tiles of yours. If you want the end result to look professional, then careful setting out of the tiles will be required.

Start off by finding the center of the floor, which should be your starting point. Lay the tiles out onto the floors from center out as you would like to see them, make sure that any patterns etc. are properly aligned. Remember too to allow for the joint thickness for the grout to go into. See how many whole tiles will fit onto the floor area Move the rows just slightly if need be to fit more tiles in.

How to lay ceramic tile

Learn how to lay ceramic tiles effectivley,and save money!

As you lay the tiles, use tile spacers to mark the gaps between the tiles. Use a level to make sure that all of the tiles are straight with each other.

Now comes the fun bit, the edges. To measure these tiles, lay a whole tile over the last whole tile laid. Then place the edge of the tile next to the wall. Mark the tile and then cut it to size. To cut the tiles you will need either a diamond tipped blade or you can hire proper tile cutters from your local decorating stores.

Use a high-grade tile adhesive once you have the pattern of the tiles set out. Some adhesives do dry quickly, so you may need to be fast.

Laying tiles may not be as easy as it looks. If you do get stuck, then you will need to consult a qualified tile layer. He will know what the best thing for you to do is.

In the mean time have fun laying those tiles.

A step-by-step guide for how to refinish your hardwood floors. Takes you through every step, from removing carpet, sanding, and finishing.

As the trend toward restoring older homes continues, more and more people are refinishing their hardwood floors. Hardwood floors provide years of maintenance-free beauty, yet they are relatively cheap and easy to restore. What’s more, refinishing floors on your own can save thousands of dollars while raising a property’s value.

Removing Old Carpet

If you are lucky enough to not have your hardwood floors covered by existing carpet, you can skip to the next section. If not, depending on the condition of the carpet and the pad and how they were fastened to the floor, you may have a long and tedious job ahead. Older carpet pads can bond to hardwood floors, adding hours to the task.

The best option for removal of bonded pads is to scrape them off by hand with a putty knife. Take care to follow the grain of the wood and to not gouge it as you scrape. A chemical solvent can be used to speed the process. If the pad is too well bonded, you can elect to use an electric sander to sand the pad off. The disadvantage to sanding at this point is that you may sand some of the carpet staples into the floors themselves, leaving tiny metal scars in the final product. Staples can be removed by hand with a needle-nose pliers.

Sanding the Floors


The best way to obtain an electric sander and other equipment described is through a local tool rental business. These establishments are also usually eager to provide extra information and supplies related to what they rent. Sometimes you can save money by purchasing your own sandpaper and other accessories, however.

Start sanding with the coarsest grit of sandpaper. Perform three passes, using a finer grit each time. Be careful to move with the grain of the wood as much as possible. It is also important to keep the sander moving at a steady pace to avoid uneven patches. Corners are often sanded too much as the machine passes over them repeatedly. There will always be awkward patches where the sander can not reach. The only choice is to do these patches by hand, using the same progression of coarse to fine sandpaper described above.

Once the floors have been sanded three times, they are ready to be prepared for staining. Use tacking cloth, sold at hardware stores everywhere, to pick up the sawdust and other debris left after sanding. Make sure to pick up plenty of tacking cloth because you will also need it for the staining process.

Staining the Floors


After selecting a stain matching your taste, gather up plenty of rags and some old clothes. Apply the stain with the rags in a circular motion. Try to apply evenly to avoid any color inconsistencies. Be sure to consult the product label for drying time and other important information particular to that brand. If after the first application the stain is still too light, repeat until desired color is attained.

Buffing is the next step. Again, tool rental businesses are the best place to obtain a buffer. These machines are the same ones that are used to polish floors everywhere. Ask for a little advice about operating the buffer before you leave with it because they can be hard to handle. Generally, if you pull down on the handle of the buffer, it will move to the left; if you pull up on the handle of the buffer, it will move to the right. Just take it slow at first until you get the hang of it.

Use tacking cloth again to clear away dust and debris, and the floors will be ready for their first coat of polyurethane. The easiest way to apply the polyurethane is to use a mop-like tool. This prevents you from having to stoop over for hours and seems to work as well as other applicators. Once the recommended drying time has elapsed, repeat the above process twice more, making three coats of polyurethane in all.

Now your hardwood floors should be ready to go. You should wait two or three days before using the room and at least a week before putting down any area rugs (or they might adhere to the floor). Again, be sure to consult the labels of all the finishing products that you use for any specific information. Be safe and enjoy your new low-cost hardwood floors!

Oct 29, 2008

The Color Wheel


Color is the most important part of interior decorating.

Everything we see has color and we need to be able to select color to enhance the space we want to decorate.

That entails choosing multiple colors, and can become overwhelming.

That is why we have broken down the colors to show their meanings, we profile


Sanding a hardwood floor

Sanding a hardwood floor can be done in home. Create your own beautiful, natural effect with a polished hardwood floor.

Is that old carpet getting you down? Is it faded, stain embedded or just plain old fashioned? Well, how about pulling it up? You may just find that beneath it you have the makings of a first rate polished hardwood floor. Such a surface can add a real sense of charm to your home – but only if it’s done right. Here’s how:

(1) After carefully removing the carpet, sweep up all of the remaining dirt and other debris from the floor. Set all protruding nails into the floor so they are flush.

(2) Hire a sanding machine, ideally a disk type one. Fit it with coarse sandpaper and do an initial sweep of the floor to remove the roughness.


(3) Repeat sanding with the coarse paper and then do a third sanding with fine sand paper. Obviously the more sanding done with a fine sand paper, the better the final finish will be.

(4) After about the third pass, buff the floor with steel wool using a steel wool buffing machine.

(5) Use an edger to get at corners and edges after each pass by with the sanding machine. If you don’t have an edge sander, you will have to sand these areas by hand.

(6) Give the floor a careful check to ensure that all blemishes, nicks and scratches have been removed.

(7) Make sure that the floor is perfectly clean. You are now ready to apply your stain. Choose an oil based pigment stain and apply it with a brush. Use a painter’s tack rag to pick up any debris you spot in your path. Make sure that you are applying the stain only to bare, clean wood. Try to do the job with an indoor temperature of around 70 degrees.

(8) After the first coat has thoroughly dried, buff the floor with steel wool and then apply your final coat.

Apart from using a stain you may, of course, choose to apply either a varnish, a polyurethane or a penetrating sealer to your floor. If varnishing proceed as above but apply a coating of floor wax on the finished product. Finish off with a machine buffer. If using polyurethane make sure you work along the grain of the wood. Buff with steel wool between coats. To apply a penetrating sealer use a mop. Wipe up any excess with a cloth. Buff with No.2 Steel Wool after the first application and then apply a second coating.

Take your time with this project. Be especially careful not to allow any dust or dirt to contaminate the finishing process. And for the best results don’t leave it too long between the sanding and finishing stages of the job. This will prevent changes in moisture conditions from affecting the grain.

Oct 14, 2008

The Color Orange


The Color Orange

Orange, the happy cheerful color. We often overlook using orange as we find it bright and bold and too brilliant to use in our homes.

But wait, where does peach and apricot come from? Yes, the color orange. They are a tint of orange. Now you can see that we do actually use orange a lot in our interiors.

It is a warm and happy color and useful for old people's homes and institutions as it is an anti depressant and decreases hostility and irritability as well as being cheerful and fun.

It is good for use in classrooms, or where large groups of people congregate as it improves social behavior.

Orange is a fantastic color to use as an accent. Throw around some bright orange cushions to brighten up a dull color scheme, add some orange flowers to a vase to enliven the room.

Use orange as a feature wall to create a focal point, add a purple vase on the table and you have a striking feature. Using color in small amounts is a good way to introduce strong hues into your home.


Oct 5, 2008

The Color Red

The Color Red

Red is the color of roses for valentines day, romance and lust, red is an exciting color, stimulating and exciting.

No wonder the extrovert that wears a red suit to a business meeting gets noticed, not only for their boldness in color choice, but the sense of power that it carries.

Red is brave and carries good luck, it is a very popular and important color in asian societies.
How do we use it in the home?

With caution if you want to use it in bulk, if not, scatter it everywhere! To make a room feel cosy you can use red for the walls, it will enclose the space, but it does make it more intimate.

Red can be broken up and diluted as such, as shown here by the addition of taupe and gold in the fabric pattern.

I wouldn't suggest red for a bedroom as it increases your respiratory rate, and what you usually want to do in your bedroom is lower your rate, relax and sleep. But you can use it as accents and that is where red really excels.

I have seen a few commercial schemes that have taken some design ideas from the 1960's, the rooms are pure white and have red leather sofas and red pendant light fittings, they look spectacular, red is the focus and it draws you in to sit down and then look up at the lights. Simple yet effective. You may not want to be so dramatic in your home, but red can be a great color for focal points or features.

A red wall around a fireplace immediately hints of cosy warmth, even if it is not lit. A red wall in the entry of your home suggests bold opulence. One area that red has probably not been thought of for is the dressing room, a private space in your home, red flatters the skin and you will look your best while you are putting on your makeup and getting dressed.

Sep 27, 2008

Color and Nature


The Observation of Color in Nature to Improve our Design

To unleash the creativity of a designer, simply start observing your surroundings. Take a stroll through the park, what do you see?

Trees, grass, water, ducks, leaves, flowers.

That is what everyone sees but look a little closer, look with a designer mind. Look at the way the bark covers the tree trunk, observe the myriad of colors within one small piece, retrace the form, feel the texture and see how it contrasts to the smoothness of the leaves.

Look how the sunlight can make the bark look different from when it is in the shade, observe the effect of shadow.

You can use these observations to learn how color, light and texture work in the interior. Another example is a flower, look closely, there is often more that one color in a single flower, and it frequently goes by unnoticed.

This simple use of juxtaposition means that the secondary color intensifies the main

Another example - a pond of water, the shadows created by the clouds in the sky, the different depths of water, and once again the juxtaposition of other items in the pond combine to create a fantastic monochromatic scheme of blue/green.

We need to slow down our hectic pace and deadlines that drive us to create without thinking and take the time to appreciate what is around us, this acts as our catalyst to design. How many times have you had a mental block and no matter which way you look, there seems no solution? Many! A simple stroll in the park can be all that is required to clear you head, get the blood moving around the body and gives you time to observe where design begins, at nature.

Carry around a note book and jot down your observations, what colors look great together, how the different textures of similar items create a subtle design, how the light can highlight or obscure, how much of a different color do you need to make a statement, how a mass of wild flowers with hundreds of different colours can work together to form a subtle single entity, how the curved flowing lines of a Willow tree are softer than the brutal severe lines of a Pine tree.

With these observations think how you would relate them back to your work, and how they can work in with people; after all we are the main reason for design, to create environments in which we can perform specific tasks comfortably.

Sep 25, 2008

How to Create a Color Scheme

Where to Start?

It is important when planning the scheme of a new house to look at the positioning on the site. Work out which rooms will have a lot of sunlight and which will not. If a room is on the cool side of the house use warmer colors, and vice versa. Select one thing that will be constant throughout the entire scheme so that it will flow through the house.

For example the same paint color for all the doors and skirting boards. Visualise from the plans the spaces in 3 dimensions and work out what you will be able to see from each room, and then ensure the colors that you select are pleasing on the eye when viewed simultaneously.

Defining separate areas with a change in flooring If you want to define separate spaces, a change in floor finish works well. For example, solid timber floor in the kitchen area and dining room, (a large rug under the table and chairs will define that space as separate) moving onto carpet for the living area. Remember to consider all the elements of a room and not rely on one fantastic piece to express all. Creating visual balance and harmony is the most important thing. In general all other areas of selection are similar to those described in the renovation explanation to follow.

When renovating and redecorating existing spaces, it is not often possible to alter the flooring, so the best advice then is to choose something inspiring that you have to start your color scheme from. It could be an antique chest, a Chinese ceramic, a Turkish rug, a favorite chair or painting. Then use this item as your base to start selecting your color scheme.

it may sound daunting but as with any large task, if you break it down into small steps and successfully complete each – the whole task will come together.
The more frequently you practice these tasks, the easier it becomes until before you know it, you are achieving even bigger tasks.

Here is a methodical way of selecting color schemes, once you have taken the client brief.
(Client Brief: this is the client’s expectations or desired outcome. It is what they want to achieve, what they like and dislike, how they live and their family situation. It also encompasses a basic explanation of their existing items to be used and incorporated into the scheme.)

Sep 20, 2008

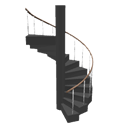
This page lists some additional 3D models that you may import in Sweet Home 3D

FREE FREE 3D models Download FREE

Spiral staircase


Darker grand staircase


Grand staircase


Spiral staircase

Aug 23, 2008

Dining rooms

Dining rooms

If you want to enjoy a meal every time you have it, if you want to feel special at your home by having nice dinner with whole family, friends etc, it`s important to have dining room furniture. Dining room furniture is something that can make the atmosphere enchanting and will help you to have an illusion of complete nice home. When you are ready for dining room furniture you will have a decision to make. One of them is the color that will match to your house, another one is design and last but not least decision that you have to make is the material that your dining furniture will be made.............


Aug 5, 2008

Trip Table by Govsa Composites

Trip Table by Govsa Composites

Trip table does not promise to be a space saver, storage-combined or multipurpose desk, but yes, it stands aside as an iconic furniture with unparalleled structure. This Turkish masterpiece is designed by Pinar Yar and Tugrul Govsa of Govsa Composite. It’s a total breakaway from the contemporary designs which become heavy and box-pattern in order to merge number of shelves and drawers. Trip table is very light yet strong and durable for being made with the thinner walls filled with polyurethane. Unusual shape with a big whole in the middle seems like being inspired by the cave structure. Moreover that dazzling blood red finish is just like icing on the cake. Use it as a coffee table or let it hold your bedside lamp to reflect a marvelous sight to enjoy.

Topolounge reminds of 'Star Wars' fame furniture

Topolounge reminds of 'Star Wars' fame furniture

What you see here is a computer interpretation of an incredible piece of furniture, the Topolounge, from Howeler-Yoon architecture firm. It’s numerous contours, rigid chrome steel body, it’s unusual curves and shining silver grey shade remind me of the interiors in the ‘Star Wars’. Topolounge has been exclusively designed for spacious lobbies and waiting rooms. It’s curves can fit along with curvy walls and contours are gestured to sooth the occupier in any pose from sitting to reclining. The above piece has been designed for a lobby in Boston but site specific pieces, too, can be created

Aug 1, 2008

Modern Interior Living Rooms

Modern Interior Living Rooms Images

Living room is the place where we spend the most of our time when we are at home and is the most frequented room of the home. That is why it is important to have nice and comfortable living room furniture. Set furniture can bring you necessary assurance and calm feelings in our life. Living room furniture set should it have sofa, armchairs, coffee table, dining table, chairs, wall units, entertainment center or TV cabinets, bookcase, buffets and so on. Living room is a room for entertaining guests, reading, watching TV or other activities.


Jul 29, 2008

Modern Interior Kitchens Images

Modern Interior Kitchens Images

Why do you need to think about kitchen if you already have one? First, you made search on the internet and you definitely look for kitchen. Second, you`re here probably because you are a person who loves to cook. Kitchen is like a place you work at. If you like that place, the productivity and quality will be much better. A new modern kitchen will inspire you to make something special. Even if you like your old kitchen, the new and modern is something that can make you to think about. Find the kitchen that will not only meet all your needs, but will also be stylish and match to your house perfectly.


MORE>>>>Modern Interior Kitchens Images
Google Groups
Subscribe to design helper
Email:
Visit this group